Showing posts with label healthy eating. Show all posts

Homemade Yogurt Ranch Dressing

Feb 1, 2014


Near the beginning of our journey to healthier eating, I stopped buying ranch dressing. The primary reason was because we were avoiding dairy but also to avoid the preservatives and MSG. When we were ready to try dairy again, we tried a few natural and organic brands, but none of them passed our taste tests.

Currently, we are consuming dairy mostly in the form of butter, yogurt and, occasionally, cheese. I adapted this recipe from Linda's Lunacy by replacing the sour cream with yogurt and leaving out the buttermilk. If you need it thicker for dipping vegetables, use Greek yogurt or strain your regular yogurt through cheesecloth for a couple hours first. You can adjust the herbs to suit your preferences.


Yogurt Ranch Dressing
1 c mayonaisse (homemade or store-bought)
1 c plain whole milk yogurt
3/4 tsp garlic powder
3/4 tsp onion powder
3/4 tsp dried dill
3/4 tsp dried parsley
3/4 tsp sea salt
3/4 tsp fresh ground black pepper

Whisk together in medium bowl, then transfer to glass jar with lid. Refrigerate for at least an hour to let flavors combine before serving. Keep in the refrigerator for up to a week. 
Makes just over two cups and fits in a pint jar.


Linked to Super Saturday Link Party

Banana Chocolate Chip Muffins

Feb 23, 2013


Just look at those chocolate-studded muffins. Don't you just want to pluck one right from your screen? While I would love to take full credit for them, I can only say that I know how to follow a recipe. The recipe for these little gems comes from Maryea at Happy Healthy Mama. I followed her recipe almost exactly, using honey instead of agave and choosing mini chips over regular. They are delicious! Now, when I'm in the mood for banana muffins, I'll have to choose between these and my other favorite recipe, Banana Nut Flax Muffins. Decisions, decisions...


*Tip: Suitable for Feingold Stage 1, if you replace applesauce with pear sauce.

Cinnamon Swirl Bread {Homemade Holidays}

Nov 18, 2012

Over the years, I've given many different types of food gifts for the holidays. Hot cocoa mix. Cookie platters. Homemade candy. Fruit baskets. Themed food baskets. Restaurant gift cards (that counts, right?).
photo credit

My all-time favorite food gifts are quick breads, whether in the form of loaves or muffins. For gift-giving, you can put them in decorative pastry boxes or wrap them in cellophane, tied with a ribbon, and place them in a cute basket. They are versatile too. They can be eaten immediately or frozen for later. Quick breads can be breakfast, snack, or dessert. Sweet or savory. Healthy or indulgent. But almost always, they are quick and easy to make. To be honest, quick breads are my favorite holiday gifts because they are my favorite baked goods and it's just an excuse to make several different kinds at once. One for you, one for me...

Banana nut muffins and blueberry muffins are favorites with most people. Even people who claim to hate pumpkin have enjoyed my pumpkin chocolate chip muffins. If I remembered to put some zucchini in the freezer during the summer, then you can bet someone will be getting zucchini bread. During the holidays, I also like to make recipes that include the traditional ingredients: cranberries, orange, lemon, dried fruits, and nuts. Cranberry orange bread. Lemon poppy seed bread with a sugary lemon glaze. Oh.my.goodness.

Of course, coffee cakes make good gifts too. My favorite is chocolate chip coffee cake. Actually, it's the only coffee cake I ever make and I save it for special occasions. Nothing says special occasion like a cake made with butter, cream cheese, and chocolate chips, topped with cinnamon-sugar and pecans. If you lack self-control, do not make this. Consider yourself warned. If you would prefer something that is a little less rich, the following recipe may fit the bill.

Cinnamon Swirl Bread
(slightly adapted from Taste of Home's Healthy Cooking magazine)

2 cups whole wheat pastry flour
3/4 cup rapadura (or sweetener of choice)
1/2 tsp baking soda
1/2 tsp, plus 1 1/2  tsp ground cinnamon, divided
1/4 tsp sea salt
1 lg. egg
1 cup (8 oz) plain whole milk yogurt
1/4 cup coconut oil, melted
1 tsp vanilla extract
1/4 cup brown sugar, packed

Preheat oven to 350 degrees. In a large bowl, combine flour, sugar, baking soda, 1/2 tsp cinnamon, and salt. In a separate bowl, whisk egg, yogurt, oil, and vanilla. Stir into the dry ingredients only until moistened. In a small bowl, combine brown sugar and 1 1/2 tsp cinnamon.

Spoon a third of the batter into a greased 8"x4" loaf pan. Top with a third of the brown sugar/cinnamon mixture. Repeat layers twice. Using a butter knife, swirl the batter.

Bake for 45-55 minutes or until a toothpick inserted near the center comes out clean. Cool for 10 minutes before removing from pan to a wire rack.

Do you give food gifts during the holidays? Or would you rather receive food? What is your favorite holiday food gift?


Linked to 4 Moms Link UpTasty TuesdayDelicious Dish Tuesday, Domestically Divine Tuesday, Titus 2 TuesdayHomemaking Link-Up, Better Mom Monday, Wonderful Food Wednesday.

The Easiest Summer Fruit Salads

Aug 12, 2012


Why eat only one sweet, ripe, summer fruit at a time when you can combine them for a taste sensation that will have you licking the bowl?

This is going to be a super short post since the recipe could not get any easier. Choose your combination of fruits (preferrable organic), wash them well, dice them and toss them in a bowl, then drizzle with a bit of honey, and stir gently.

That's it.  Enjoy! 

What is your favorite fruit salad combination? All berries? Citrus fruits? Every fruit you can find?

Sweet & Simple Fruit Dip

Jul 21, 2012


Did you know that there are a lot of ways to make fruit dip? I just wanted a healthier recipe that included Neufchatel cheese and Greek yogurt that was sweetened with maple syrup (and didn't include marshmallow fluff). Since I couldn't find any recipes that fit my requirements, I came up with my own. With just four whole food ingredients, it is sweet and simple.

Sweet & Simple Fruit Dip

8 oz Neufchatel or regular cream cheese, softened
8 oz (1 cup) plain Greek yogurt
1 tsp vanilla extract
maple syrup, to taste

Using whisk or mixer, blend all ingredients until smooth. Start with 1-2 teaspoons of maple syrup and add more as needed, until you reach desired sweetness. Cover and chill until needed or eat immediately.

Allergy-Friendly Food for Families {Review & Giveaway}

Jul 17, 2012


*Giveaway has ENDED*

As a Moms Meet Mom Ambassador for Kiwi Magazine, I get the occasional opportunity to sample and review some great natural and organic foods and family products. As a blogger, I was glad that they started their Mom Ambassador Blogger program because now I can share them with you, my reader, and my local natural moms group.

Parents who have discovered that they and/or their child have food allergies will be happy to add this kid-friendly cookbook to their collection. Allergy-Friendly Food for Families is from the editors of Kiwi Magazine and has 120 gluten-free, dairy-free, nut-free, egg-free, and soy-free recipes.

My first impression of the cookbook is that it is a good-quality book. Beautiful, full-color pictures printed on thick, sturdy pages in an easy-to-hold 9" x 8" size. It starts out with a brief explanation of food allergies (not sensitivities or intolerances) and a few expert-answered questions. At the back of Allergy-Friendly Food for Families, you'll find a list of products to stock your allergy-free pantry and two recipe indexes, one alphabetical and one by allergen. A special treat waits for you on the last page - a mail-in form for a free one-year (six issue) subscription to Kiwi Magazine!

The recipe section is the bulk of the book, of course, and is broken down into Breakfast, Lunch, Dinner, Dessert, Snacks and Parties, each having its own recipe index with an allergy-free key to help you find the right recipe. In addition, there are color-coded "tabs" on the edges of every page to tell you which allergens that specific recipe is free of. These are very helpful as you are flipping through. Sprinkled throughout are pages with ideas for cooking with kids and special tips. One possible negative is that there are not pictures for most recipes. For example, in the Breakfast section, there are 22 recipes and only five with pictures. Personally, I don't have an issue with it, but some might. 

You're ready to hear about the recipes now, right? Of course, if you have already been cooking for someone with food allergies, you will be familiar with some or most of the ingredients used. Considering that most allergy-causing foods are also the most commonly consumed, like wheat, eggs, and dairy, it is not surprising that their substitutes may be less common. Some of the recipes call for specialty items, like tofu, rice milk, chickpea flour, tahini, or soy-free, non-hydrogenated margarine, but the majority use ingredients found in most grocery stores. 

Here is a sampling of recipes:
  • Quinoa Maple Crunch
  • Fresh Almond or Rice Milk
  • Sweet Summer Corn Salad
  • Barbecue Chicken Salad
  • Tofu-Stuffed Shells
  • Sweet Potato Gnocchi with Lentils
  • Easy Lemon Chicken
  • Coconut No-Cream Pie
  • Cherry Chocolate Sorbet
  • Salted Caramel Hot Cocoa
  • Raw Summer Peach Tart
  • Gluten-Free Pie Crust
  • Pear Dunkers with Cashew-Cinnamon Yogurt Sauce
  • Chickpea Herb Crackers
  • Fruity Guac
  • Green Monster Dip with Carrot Coins
  • Black Bean Brownie Bites

You'll find more recipes, articles and tips at their companion website, Allergy-Friendly Cooking.

To purchase your own copy now, click HERE. If you would like to try to win a free copy, enter my giveaway below! *Giveaway ended.*


Open to U.S. residents, 18 and older. Ends at midnight on Sunday, July 22, 2012. Raising Knights is not responsible for delivery of prize; it will be sent directly from the company.
a Rafflecopter giveaway


Disclaimer: In exchange for an honest review, I was provided with a free copy of the cookbook for myself and Kiwi Magazine will be providing another copy to the contest winner. 

Free eBooks

May 10, 2012


I never understood what all the hoopla over smart phones was about...until I got one. One of my favorite things is being able to download free ebooks from Amazon.com directly to my Android phone. Here are several free ebooks, but I don't how long they will be free, so be quick!

Fresh Fruit Pies, Tarts, and Galettes - Every Recipe has a Gluten Free Alternative

Grandma's Best Muffin Recipes (Grandma's Best Recipes)

Healthy Whole Grains, Easy and Delicious Soup Recipes

The Organized Kitchen: Keep Your Kitchen Clean, Organized, and Full of Good Food-and Save Time, Money, (and Your Sanity) Every Day!

Amazon's collection of free Classics eBooks are perfect for homeschoolers or anyone interested in good literature. Download Treasure Island or Gulliver's Travels for the next time you have to wait in the car for soccer practice to finish or while you are waiting to see the dentist.

Marinated Cucumbers

May 9, 2012


When we are eating away from home and my husband reveals another of his favorite foods, I try to find a recipe to replicate it at home. I found a simple recipe for one of my husband's favorite summer dishes in Joy of Cooking. I have only altered the amounts and omitted the onion to suit our family.

Marinated Cucumbers
4-5 cups peeled, sliced cucumbers (about 3 large cucumbers)
Sea salt
1/3 cup apple cider vinegar
2 Tb sugar, dissolved in 2 TB water
Sea salt and pepper, to taste
Chopped dill, garnish

In a large bowl, layer cucumber slices, sprinkling lightly with sea salt. Place a weighted plate or heavy bowl on top, cover large bowl, and refrigerate for two hours. Rinse the cucumbers in colander under cold water, drain, and pat dry. Return to bowl and toss with apple cider vinegar and sugar solution. Season with salt and pepper. Chill at least an hour before serving. Garnish with chopped dill, if desired.

Linked to Homemaking Link-Up.

Hearty Lentil Soup

May 4, 2012


Finally! I have found a lentil recipe that my family will eat. I started with Marie's lentil soup recipe and combed through the comments to discover the best ways to tweak it. The result is a hearty, flavorful thick lentil soup with lots of veggies. I finely chopped the veggies, letting my Vitamix do the work on the carrots, to get a more uniform texture and to disguise them for my picky eater, who has issues with food textures. Next time, I will probably use crushed tomatoes, like the original recipe calls for, or petite diced tomatoes. If you are going to save some for later, remove that amount and do not add the kale or spinach to it until you are ready to serve it.

Hearty Lentil Soup

3-4 Tb olive oil
1 onion, chopped
5 medium carrots, diced
2 celery stalks, chopped
4 garlic cloves, minced
2 tsp dried oregano
1 tsp dried basil
1 bay leaf
2 tsp ground cumin
1 (14.5 oz) can diced tomatoes
2 Tb tomato paste
2 cups dried lentils
8 cups chicken or vegetable broth (or half water)
1 cup ditalini or other small pasta
1/2 cup kale or spinach, rinsed and thinly sliced
2 Tb apple cider vinegar
Sea salt and cracked pepper, to taste
Parmesan, optional

In a large pot, heat olive oil over medium heat. Add onions, carrots, and celery; cook and stir until veggies are tender.

Stir in garlic, oregano, basil, cumin, and bay leaf; cook for a couple of minutes.

Stir in lentils, water, chicken broth, tomatoes, and tomato paste. Bring to a boil. Reduce heat and simmer for at least an hour, adding the pasta about 15 minutes before serving.

Just before serving, stir in kale or spinach and cook until it wilts. Add vinegar and season to taste with salt and pepper. Top each serving with grated Parmesan, if desired.

Linked to Tuesdays at the TableDomestically Divine TuesdayWhat's Cooking Wednesday, Homemaking Link-Up, and Full Plate Thursday.

Homemade Pasta Sauce

Feb 9, 2012


I seriously thought about titling this post "I Left Paul Newman" but I was a wee bit concerned about the tabloid paparazzi showing up at my house. Up until recently, my pasta sauce of choice was Newman's Own Sockarooni. One night, I started boiling my spaghetti and discovered that I did not have Sockarooni in my pantry like I had thought. Ugh!

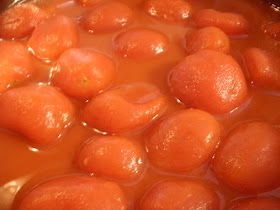
Since my options for a quick dinner were limited, I decided to forge ahead and make my own sauce using the giant can of whole tomatoes that I had purchased at Sam's Club. After all, that's why I had bought the can to begin with. That over-sized can that sat on the floor next to my pantry, sheltering dust bunnies for the past few months. {Ahem} I did a quick glance at the pasta sauce recipes in my trusty Joy of Cooking cookbook and got started.

My first attempt was pretty good, but since then, I've made our pasta sauce from scratch several times, tweaking and getting familiar with it. Now, I'm ready to share with my readers. Just in case there is someone else out there who is brave enough to leave Paul Newman (or whoever else may make your pasta sauce). I suggest looking at the ingredient list of your favorite pasta sauce and adjusting whatever recipe you use to reflect that. This is a great large family or once-a-month recipe.

Pasta Sauce (makes about 12-14 servings)
 
1 (102 oz.) can whole peeled tomatoes, undrained
1 (6 oz.) can tomato paste (you could probably use two cans)
1/4 cup extra-virgin olive oil
2-3 garlic cloves, minced (or 1-2 tsp. jarred minced garlic)
2 tsp. Italian seasoning
1 tsp. oregano
1-2 tsp. sea salt or kosher salt
1/4 tsp. fresh ground black pepper
honey, to taste (I use about 1 tsp. to balance out the acidity)


Pour the undrained tomatoes into a large, shallow dutch oven or deep skillet. Heat over medium.


Using a potato masher, crush tomatoes until no large chunks remain. Add remaining ingredients.


Bring to a simmer. Simmer on low for several hours or until sauce is reduced and thickened, stirring occasionally. Taste and add more seasoning, if desired.

At this point, I remove half of it and put it in a large jar or gallon-size freezer bag to freeze for another meal later. If you use a jar, fill it leaving a few inches for expansion. With a freezer bag, make sure it's sealed (double-bag, if you're skeered), lay it flat on a cookie sheet and freeze until solid. Then remove cookie sheet and store the sauce horizontal or vertical, your choice. You don't have to use the cookie sheet, but it keeps the bottom of the bag flat instead of sagging through the gaps in the wire racks and making it a little more difficult to remove from the freezer.


We like a meat sauce, so I use ground beef that I pre-cooked with onions and garlic and froze. I add it about 15-20 minutes before serving and simmer until the sauce and meat are heated through. Serve over your favorite pasta and add a salad.

Linked to: Homemaking Link-Up, Tasty Tuesday, Healthy 2Day, Simple Lives Thursday, Full Plate Thursday, Pennywise Platter Thursday

Healthy Homemade Hamburger Helper

Feb 3, 2012


This is kid-friendly comfort food. Savory. Creamy. Hidden vegetables. While searching for a ground beef stroganoff recipe, I found Eating Well's Hamburger Buddy recipe {which is much prettier than mine}. I haven't had Hamburger Helper for... I don't even know how long. I can't honestly remember what it tastes like, but this is supposed to be just like it, only healthier. Then, as I was reading the comments to see how everyone made adjustments, I clicked through to Amelia's version. Armed with all of those suggestions for adjusting the original recipe, I began whipping up my own, also increasing the amount to feed my small army, of course. The results were delicious! All of us had seconds, even Miles. It's definitely going into the regular meal rotation, along with salad.


Here are the changes I made:
  • I used a 32 oz. carton of organic beef broth and added about 1-2 cups of water with the pasta.
  • I used 3 carrots {probably 4 next time} and a 16 oz. box of farfalle pasta.
  • I added extra garlic, 1 tsp. thyme/1 tsp. oregano instead of all thyme, and Greek yogurt instead of sour cream.
  • The original recipe recommends using a food processor to chop the veggies, but the commentors said that it pureed them instead. So I used the mince grid on my handy dandy Vidalia Chop Wizard for the onions and mushrooms. I diced the carrots by hand and used jarred minced organic garlic.

Stretch Your Chickens: A Four-Act Play

Jan 7, 2012

You've heard of Rubber Chicken, haven't you? Where you roast a chicken and then use it to make one or two other meals later in the week? Well, it's a great idea, but one chicken doesn't go far in this household of seven. I roast two chickens at a time. Even if you're family isn't as big as ours, roasting two at a time is a good way to get a leg up on your meal preparation. Just pick the extra meat off the bones, chop, and freeze for future soups and casseroles. You can also freeze the bones to make bone broth.

I highly recommend buying organic or free-range chicken if it's available to you. Yes, it costs a bit more, but if you stretch your chicken, you'll definitely be getting your money's worth and be investing in your family's health. By making your own chicken stock instead of buying cans/cartons from the store, you'll save as much as or more than you paid for the chicken!

Like I said, I'm no Martha, but this bird was tasty! 
Chicken, Act 1: Roast Chicken
This is how I do it, but I'm definitely no Martha.
  • Rinse both chickens, making sure to remove giblets from cavity, and place each one in 9x13 casserole dish. You can pat them dry with paper towels, if you want, but I don't think it's necessary.
  • Drizzle each chicken with extra virgin olive oil; sprinkle with coarse/kosher sea salt, fresh ground pepper, garlic powder, and Italian seasoning. I usually add a few peeled garlic cloves to the cavity also.
  • Bake at 400° for about 1 1/2 to 2 hours (depending on the size of your birds), until the skin is golden and a meat thermometer inserted into the meaty part of the thigh reads 180°. Honestly, I don't use a meat thermometer. I just cook it until the  skin is really golden and crispy and then cut into the breast to make sure it's cooked all the way through. But, I'm not a food expert, so be safe and take its temperature.
  • Serve part or all of one chicken to your family for dinner. Pick the remaining meat from the bones of both chickens, reserving the bones/carcass. Chop the meat into bite-size pieces and refrigerate or freeze in recipe-size portions. Refrigerate or freeze the bones to make stock for soup. Reserve drippings for gravy.
I'm no photographer, either!
Chicken, Act 2: Chicken Gravy
You may choose to make and serve this immediately with mashed potatoes or save for lunch the next day. Makes about 2 cups.
  • Spoon pan drippings into a small saucepan. Add enough water or chicken broth to make about 1 1/2 cups. Heat on medium.
  • In a cup, whisk 1/4 cup water and 1/4 cup flour together until smooth. Add to saucepan, whisking until smooth. Heat until thick and bubbly. Season, to taste, if necessary. But it probably won't be if you were as liberal with the seasonings as I am. :)

Chicken, Act 3: Chicken Stock or Bone Broth
If you've ever wondered what the difference is between broth and stock, read THIS to find out. Nourished Kitchen also has instructions for making bone broth in a slow cooker. I make chicken bone broth very much like I make whole chicken broth, only I use the chicken carcass. 
  • Add the chicken bones, a few carrots and celery stalks, cut in chunks, an onion, cut in wedges, a few smashed garlic cloves, some peppercorns, a teaspoon or so of sea salt, a couple of bay leaves to a stock pot, and a tablespoon of white vinegar; cover with filtered water. Some people use vegetable trimmings that they've saved, but I don't usually have those available.
  • Bring it to a boil, then reduce to a simmer for several hours. 
  • Using a slotted spoon, remove the bones and veggies, then strain stock through sieve into quart or half-gallon canning jars, if you won't be using it right away.
Chicken, Act 4: More Meals
Now, your chicken can be a star in the production of your choosing. Here are a few ways that I use the leftover chicken and/or stock:
  • Chicken noodle or rice soup
  • Chicken tortilla soup
  • Chicken pot pie
  • Chicken burritos or enchiladas
  • White chicken chili
  • Chicken salad
  • Chicken pesto pizza (a favorite from a local pizza place; pesto instead of red sauce, broccoli florets, sun-dried tomatoes, black olives, chicken, cheese)
Do you stretch your chickens?


Linked to Homemaking Link-Up.

Wholesome Banana Nut Flax Muffins {aka Brain Booster Banana Muffins}

Nov 21, 2011


This is my original healthified banana muffin recipe I posted before, but I tweaked it a bit so I thought I'd repost it. This redux is made with honey instead of sugar. I just entered it into the Chiquita's Ultimate Banana Recipe Contest. {You can view it HERE, along with lots of other yummy recipes. I'll let you know if it makes the top ten, so you can vote!} These muffins are packed with brain-boosting omega-3 fatty acids, protein, and potassium. By using almond milk, you can make it dairy-free also. Makes 12 large muffins.

Banana Nut Flax Muffins {aka Brain Booster Banana Muffins}
1 1/2 cups whole wheat pastry flour
1/2 cup ground flaxseed
1 cup chopped walnuts
1 Tbsp baking powder (aluminum-free)
1 tsp ground cinnamon
1/4 tsp ground nutmeg
1/2 tsp salt
2 ripe bananas
3/4 cup almond or dairy milk
1/2 cup honey
1/3 cup coconut oil, melted
1 large egg


Preheat oven to 375ºF. Line muffin tin with paper liners. Mix flour, flaxseed, walnuts, baking powder, cinnamon, nutmeg, and salt in a large bowl. In separate bowl, mash bananas; stir in milk, coconut oil, honey, and egg. Add banana mixture to dry ingredients; stir just until moistened. Using an ice-cream scoop, fill muffin cups. Bake about 20 minutes or until lightly golden. Cool for a few minutes; remove to wire rack to cool or serve warm with butter.

Linked to Homemaking Link-Up, Tasty Tuesday, Pennywise Platter Thursday, Feeding Boys Recipe Link-Up

Menu Plan Monday 8/29/11

Aug 30, 2011

Sunday, we made a family outing to the orchard and a farm stand and came home with lots of fresh produce. Needless to say, this week's menu will be making use of peaches, tomatoes, corn, peppers, squash, green beans, and eggplant (I haven't had much experience with this one).

Breakfast:
  • Eggs & toast
  • French toast
  • Egg sauce over toast
  • Oatmeal
  • Breakfast burritos (eggs, turkey sausage, cheese)
Lunch:
  • Tuna salad on toast
  • Bean & cheese quesadillas
  • Grilled turkey & cheese sandwiches
  • Pasta salad
  • Baked potatoes & beans
Dinner:
Baking:

Healthy Banana Muffin Makeover

Jul 8, 2011


The following recipe is one I have had for many years. Along the way, I have made healthier substitutions resulting in a moist, nutritious, dairy-free, whole-grain muffin made with healthy fats. This is a great way to use those over-ripe bananas sitting on your counter.

Banana Muffins (original recipe)
1 1/2 cup unbleached all-purpose flour
1/2 cup toasted wheat germ
1 cup chopped walnuts (opt.)
1/2 cup light brown sugar, packed
1 Tbsp baking powder
1 tsp ground cinnamon
1/4 tsp ground nutmeg
1/2 tsp salt
2 ripe bananas
3/4 cup milk
5 Tbsp canola oil
1 large egg


Healthified Banana Muffins (makeover)

1 1/2 cups whole wheat pastry flour
1/2 cup ground flaxseed
1 cup chopped walnuts (opt.)
1/2 cup unrefined sugar (or honey, see note*)
1 Tbsp aluminum-free baking powder
1 tsp ground cinnamon
1/4 tsp ground nutmeg
1/2 tsp sea salt
2 ripe bananas
3/4 cup almond milk
1/3 cup coconut oil, melted
1 large free-range egg

Preheat oven to 400ºF. Line muffin tin with paper liners. Mix flour, flaxseed, walnuts, Sucanat, baking powder, cinnamon, nutmeg, and salt in a large bowl. In separate bowl, mash bananas; stir in milk, oil, and egg. Add banana mixture to dry ingredients; stir just until moistened. Using an ice-cream scoop, fill muffin cups 3/4 full. Bake about 20 minutes or until lightly golden. Cool for a few minutes; remove to wire rack to cool. Or serve warm with butter. :)

*Note: If using honey, reduce oven to 375ºF. As long as you don't double the recipe, you may not have to adjust the liquid amounts because of the honey. If you increase the recipe to require at least one cup of honey, you'll need to reduce the milk by 1/4 cup for each cup of honey.

Linked to Simple Lives Thursday and Tuesdays At the Table.


Blueberry Almond Buckle

Jun 26, 2011


We absolutely love blueberries here! They get eaten by the handful and star in muffins, smoothies, pancakes, and waffles regularly. I took LJ, IB, and M2 blueberry picking yesterday. Well, M2 slept on my back in the Patapum carrier. The boys didn't last very long in the sweltering heat, but we did manage to pick about 2 1/2 quarts of sweet purple berries.


My plan was to make muffins, as usual, until the boys let me know that they were tired of muffins. So, when we got back home, I went for my King Arthur Flour Whole Grain Baking cookbook. I quickly decided on Blueberry Buckle. While I was gathering my ingredients from the pantry, I noticed a bag of sliced almonds and thought I would alter the recipe a bit. I also doubled the recipe but the following recipe is for the original 9X9 pan size. Just in case, you don't want a LOT of this super yummy, moist, flavorful, whole-grain coffee cake bursting with sweet blueberries and topped with buttery, crunchy, cinnamon-y streusel topping, use the recipe as is. If you double, you can use two 9X9 baking dishes or a 9X13 for a tall cake. That's what I did and it needed to bake for a few minutes longer, ending up with the bottom corners a tad bit overdone. Barely noticeable, though. If you would like a better presentation, use a round springform pan and slice into wedges. We're more into quantity and quality around here.

Blueberry Almond Buckle

Streusel
3/4 cups sugar
1/2 cups whole wheat pastry flour
1/4 cups unbleached all-purpose flour
1/4 cups rolled oats
1 tsp ground cinnamon
1/4 tsp ground nutmeg
1/4 tsp salt
6 Tbsp (3/4 stick) unsalted butter, softened
1/4 cups sliced almonds (opt)

Buckle
2 cups white whole wheat flour
1/2 cups unbleached all-purpose flour
2 tsp baking powder
1/2 tsp salt
4 Tbsp (1/2 stick) unsalted butter, softened
1 cups sugar
2 large eggs
1/2 cups milk (I used almond milk)
1/2 tsp vanilla extract
1/2 tsp almond extract (opt., if not using, double vanilla)
2 cups blueberries, rinsed (fresh, or, if using frozen, do not rinse or thaw)

Preheat oven to 375 degrees. Grease and flour a 9" square pan.

Make the streusel: Whisk together sugar, flours, oats, cinnamon, nutmeg and salt in a medium bowl. Cut in the butter to make medium-size crumbs. Toss in almonds, if using.

Make the buckle: Whisk together flours, baking powder and salt in medium bowl. Cream together the butter and sugar in large mixing bowl until light and fluffy, then add the eggs, one at a time, stopping to scrape the sides between additions. Stir in half the dry ingredients, then the milk and extracts, scraping down the sides. Stir in the remaining dry ingredients, then gently fold in the blueberries. Spread the batter in the prepared pan, and sprinkle the streusel evenly over the top.

Bake until a cake tester inserted in the center comes out clean, about 45-50 minutes. Remove from the oven and let it cool, in the pan, on a rack.

Linked to Tuesdays at the Table and What's Cooking Wednesday.

Natural Candy Store

May 20, 2011


It's everywhere! It's everywhere!

As a mom who tries to feed my boys healthy, natural foods, it can be very difficult to handle the candy situation. In the past, I've tried to eliminate it, control it, demonize it, confiscate it, but candy is a HUGE part of our culture. You cannot go anywhere without finding it. Mints with your dinner bill. Candy displays at every check-out. Gumball machines near the door of every restaurant and store in town. Suckers at the doctor's office and the bank. Handfuls of candy thrown at you during parades. Kids bringing it home from school and parties. Commercialized holidays that seem to center on it. Well-meaning, but uninformed grandparents...Ahem.

So, I have taken turns being lenient about candy and all-together throwing my hands up in the air. One of my favorite things to keep around (when we can afford them) are YummyEarth organic lollipops. We all love them, every flavor, but the ones that usually go first are the blueberry and the pomegranate. Until now, other than the occasional organic chocolate or xylitol gum from the health food store, that was the only natural candy I had to offer my kids. Today, I was lucky enough to stumble upon NaturalCandyStore.com. I was so excited to find a one-stop shop that offers candy with no high-fructose corn syrup, no artificial colors or dyes, no artificial flavors, no artificial sweeteners, and no preservatives. And the selection is NOT limited to a few varieties or brands. There are chocolates, candy bars, hard candies, gummies, candy sprinkles for baking, marshmallow creme, fudge...you get the idea. 

So you can see why I was excited! Yes, it's a bit more expensive. Yes, it's still sugar. But if you have a choice, why not choose the better option? Think of how much less guilt you will have, especially during the holidays. Of course, if your child is allergic to corn or is sensitive to artificial colors, then you'll have a way to still indulge them with a sweet treat from time to time. With every order, you can choose a free sample (or four!). And when you sign up for their newsletter, you will be entered into a monthly drawing for a $50 gift certificate.

Now, I know you are just itching to click the link to see if they have your sweet tooth's your kids' favorite treat. 

Disclaimer: This post was prompted by my own excitement and I will earn a $5 gift certificate for any new order placed through the NaturalCandyStore.com links.


Why I Love Coconut Oil

Apr 4, 2011

Nutiva Organic Extra Virgin Coconut Oil, 54-Ounce Containers (Pack of 2)A couple of years ago, I read about the nourishing qualities of extra-virgin coconut oil and bought my first small jar from a health food store. Now I'm buying 54-ounce jars and using it for several things, from cooking and baking to skin care. Just this week, I used it to make hard lotion bars and peanut butter oatmeal cookies. It does have a slight coconut flavor, so it is best for baking, although some people use it for cooking eggs and pan-frying. We also like to add a spoonful of coconut oil to our oatmeal, along with honey and cinnamon.

As far as skin care, you can use it straight from the jar for dry skin or as a massage oil or you can mix it with other natural ingredients to make things like diaper rash creamhair conditionerlip balmtoothpaste, and deodorant. There is also reason to believe that it can be used to treat some medical and nutritional issues, such as yeast infections and hypothyroidism.

"One of the good fats that comprises about 50% of coconut oil, is lauric acid. Lauric acid is a rare medium-chain fatty acid found in mother’s milk that supports healthy metabolism and is now being studied for its anti-fungal, anti-viral, and anti-bacterial health-protecting properties." - Nutiva.com

And it's not just good for humans. It has multiple benefits for dogs also. I plan on giving Ruben, our mini doxie, a very small amount each day to see if it helps with his scratching. He had fleas last summer and, although they are gone, he has continued to scratch like his skin is dry.

Tip: You can use Amazon's Subscribe & Save to get a two-pack of 54-ounce jars of Nutiva EVCO for a great price. If you don't need that much, order with a friend.


Update 4/29/11: Get a 54 oz. jar of Nutive EVCO at Vitacost for less than $22!

Disclaimer: I am not a medical expert, nor do I suggest believing everything you read on the internet.  Please be responsible and do your own research. This is not a sponsored post, I just happen to use Nutiva. The links are Amazon affiliate links, though.


Healing Chicken Soup {Yes, we're still sick...}

Mar 18, 2011

Can you believe it has been three full weeks and we are still dealing with illness? Papa Bear and I have finally gotten sick, as well as Levi and Miles...again. Miles was the first one to be sick and was fully recovered until a few days ago. Tuesday, I took Levi to the doctor and they confirmed that he has bronchitis. The other three boys are getting their strength back. I was forced out of bed very early this morning with a raging sore throat, so I took advantage of being up at dawn by enjoying some hot tea and reading Lazarus Awakening. {I'll post my review soon.} Then I got started on making chicken stock so we could have chicken noodle soup for lunch {and probably dinner}. Homemade chicken soup is not only soothing and nourishing but has healing properties.

Making chicken broth is easy and not an exact thing. You just cut up some vegetables, throw in a chicken, cover with water, and let it simmer for a few hours or so. But I know that most people like their instructions a little more specific, so I'll tell you what I do. There are other ways to do it, like the method Kimi Harris uses at The Nourishing Gourmet. Do a little research and experimenting to find out what works for you.

First of all, I buy the most natural chicken available at our grocery. It may cost a few dollars more than a regular one, but is healthier and it ends up being the best deal. I pay almost $3.00 for an aseptic box of natural chicken broth at the store, which contains about four cups. When I make my own, I end up with about five times that amount of nourishing chicken stock and have enough chicken for two meals {soups or casseroles}. For a smaller family, you could probably stretch it further.

Add to large stockpot: 
One yellow onion, cut into wedges
3-4 carrots (unpeeled), cut into 1" chunks
2 stalks of celery, cut into 1" chunks
3-4 cloves garlic, smashed
1 whole chicken, rinsed (include neck and organs, if desired)
1 bay leaf
5 peppercorns
2 tsp sea salt
Cover with filtered water by 2"

Bring to a boil; reduce heat to a steady simmer and cover. Let it simmer for at least two hours, preferrably longer. You'll know it's ready when the chicken falls apart when you try to lift it out. I use a large slotted spoon to remove chicken to a plate.

Pull chicken from carcass. You may freeze bones and carcass to make bone broth later.

Use slotted spoon to remove rest of vegetables, chicken skin, and parts.

After removing chicken and vegetables, you will still have tiny particles that your slotted spoon can't get. 

Do the next two steps in your kitchen sink
Trust me, you will probably spill some of the boiling hot liquid. Consider yourself warned.

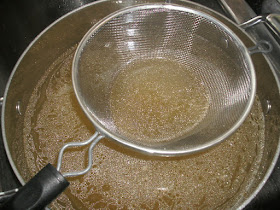
Pour the broth through a strainer into another large container. I use my other stock pot or Dutch oven. If I'm making chicken noodle soup right away, then I start adding the ingredients for that (see below). If I am not using it immediately or have too much, I pour the broth into glass jars and store it in the fridge. I use chicken broth frequently enough that I don't freeze it, but I could.

I use a canning funnel to fill my jars. The fat floats to the top and after some time in the refrigerator, it will solidify and may be removed with a spoon, if desired. These are half-gallon jars. They hold 8 cups, but I only filled them to the 7 cup mark. So, I guess you already figured out that I made 21 cups or almost 1 1/2 gallons of chicken broth.

To make chicken noodle soup:
Simply add a cup of chopped chicken, a couple of thinly sliced carrots, a sliced stalk of celery, 1/2 onion (diced), two minced garlic cloves, and 1/2 tsp Italian seasoning (or to taste). Bring to a boil; reduce to a simmer until carrots start to soften, add egg noodles and cook until desired tenderness. Salt & pepper to taste.


template design by Studio Mommy (© copyright 2015)